Google Workspace SAML integration guide
This integration guide shows how to configure Google Workspace as a SAML single sign on provider for your Redis Cloud account.
This guide shows how to configure Google Workspace as a SAML single sign-on identity provider (IdP) for your Redis Cloud account.
To learn more about Redis Cloud support for SAML, see SAML single sign-on.
Step 1: Set up your identity provider (IdP)
Create the Google Workspace SAML application
-
Sign in to your Google Workspace admin account.
-
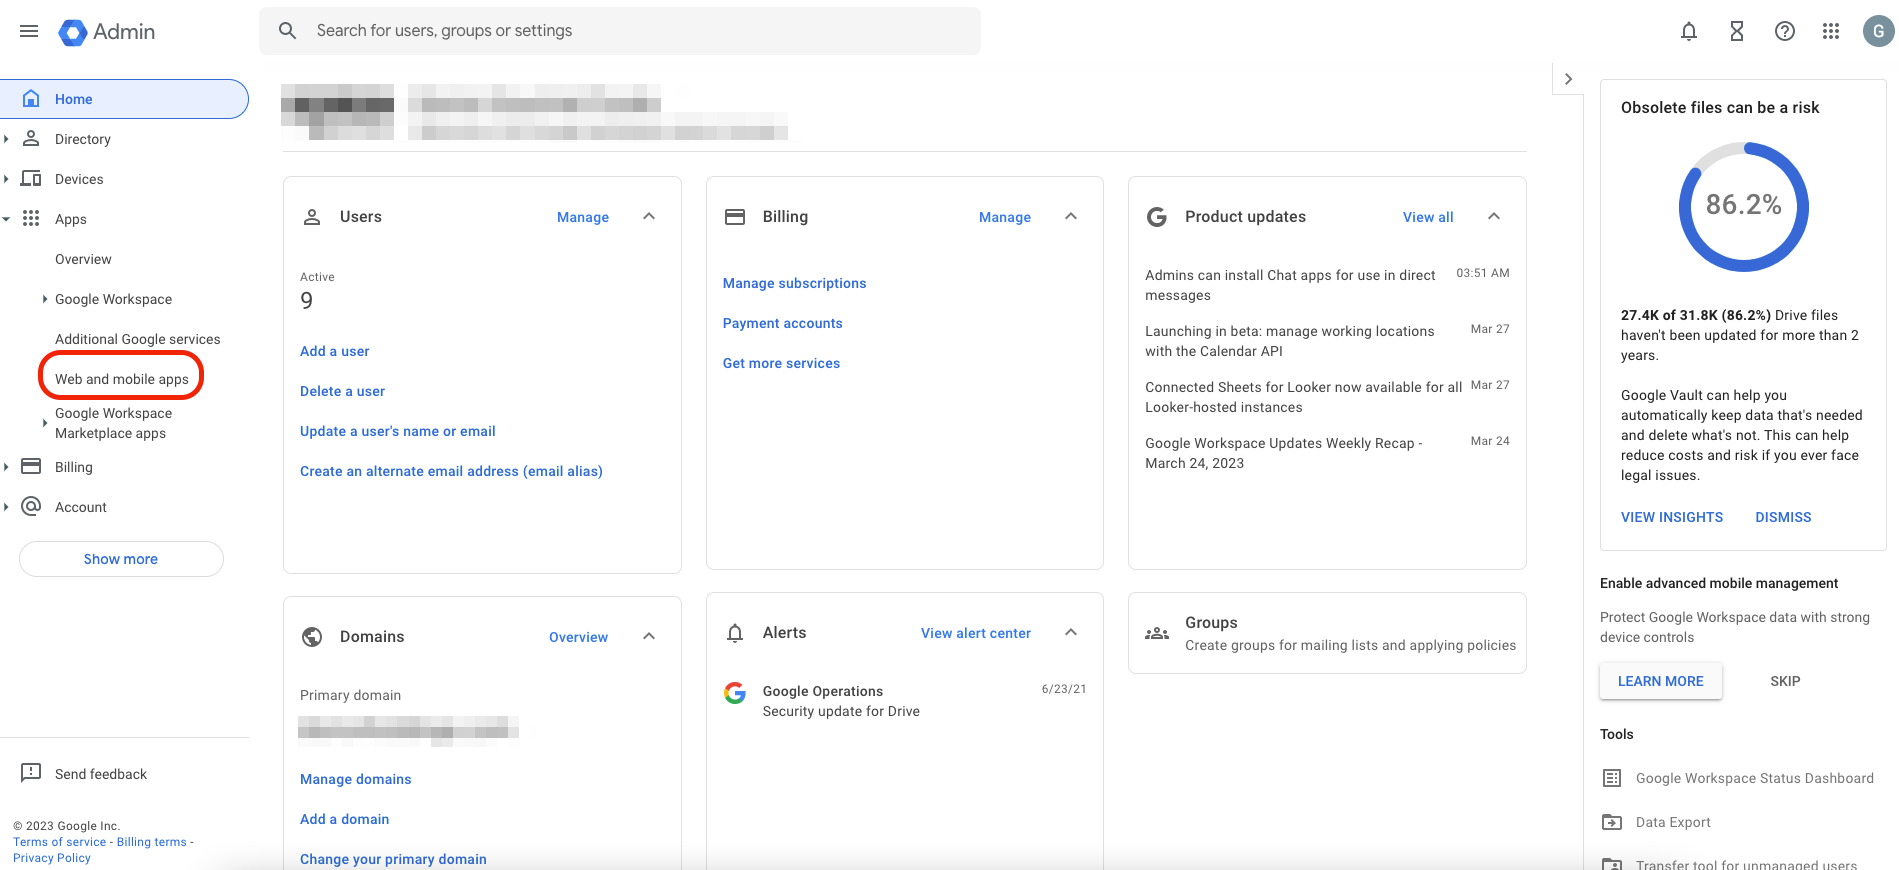
From the main menu, select Apps then Web and mobile apps.
-
Once in Web and mobile apps, select Add custom SAML app from the dropdown list.

-
To begin, change the App name and Description to Redis Cloud. You can also choose an App icon for the application. We suggest you upload a Redis icon. Once complete, select Continue.
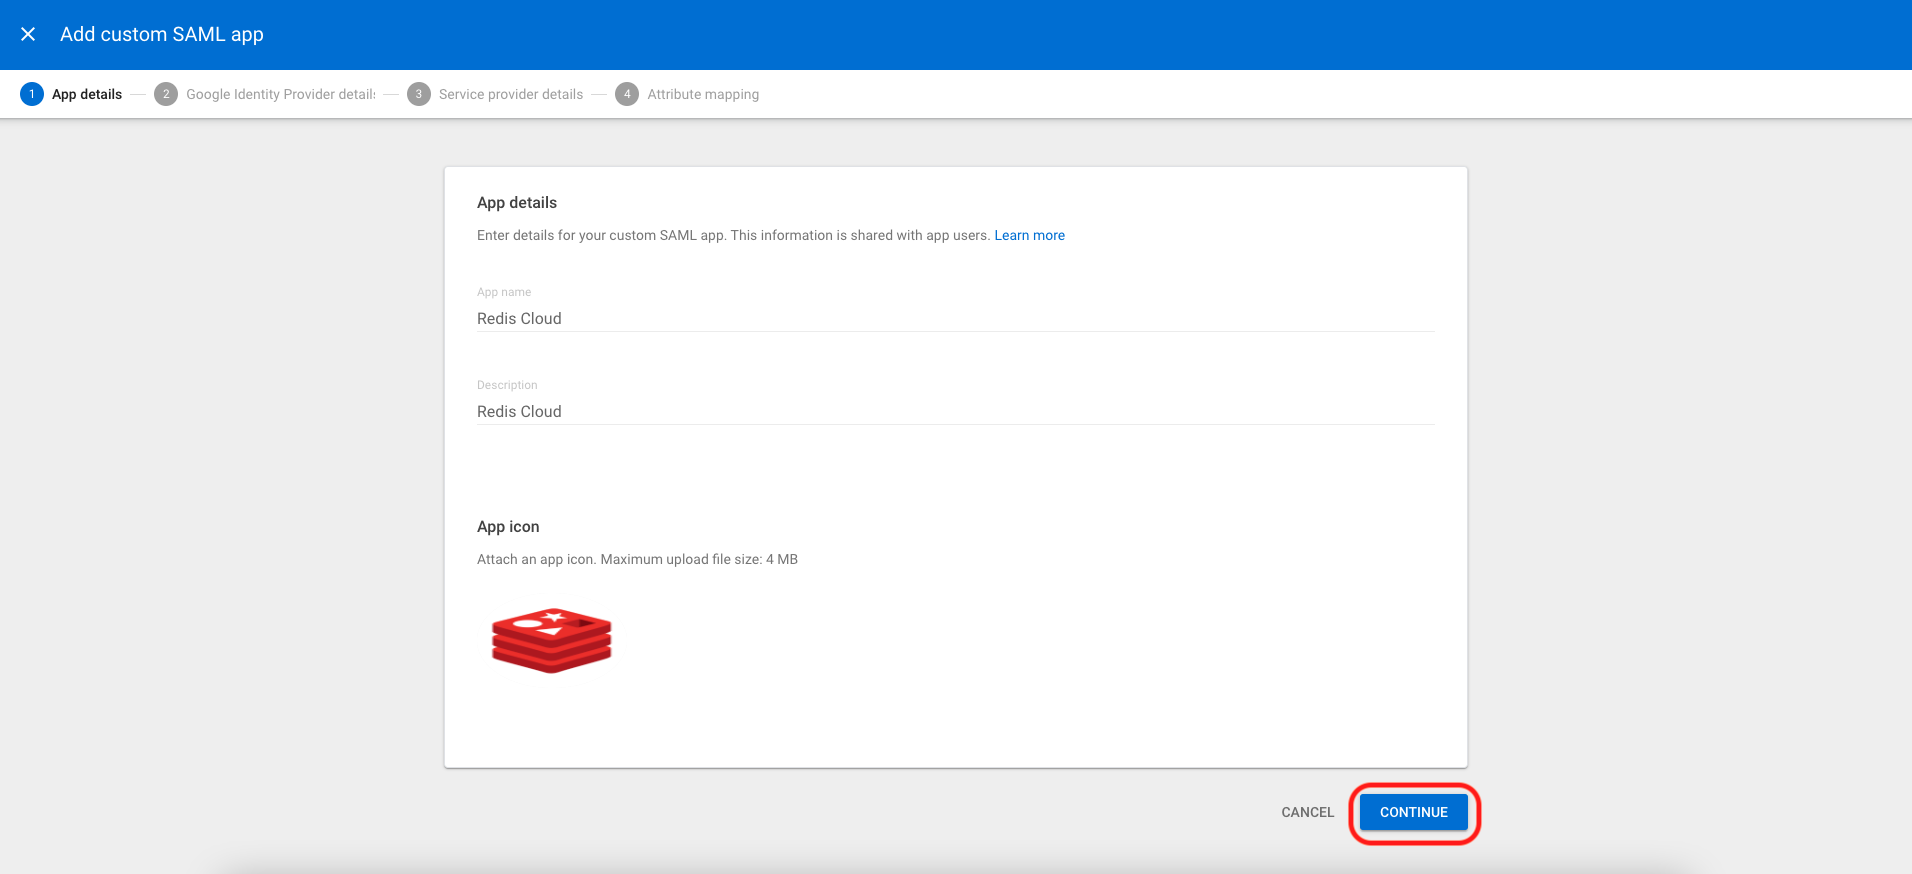
-
In the next screen, you will find all of the information needed to configure SAML in Redis Cloud. Select the copy button for the following information sections:
- SSO URL
- Entity ID
- Certificate
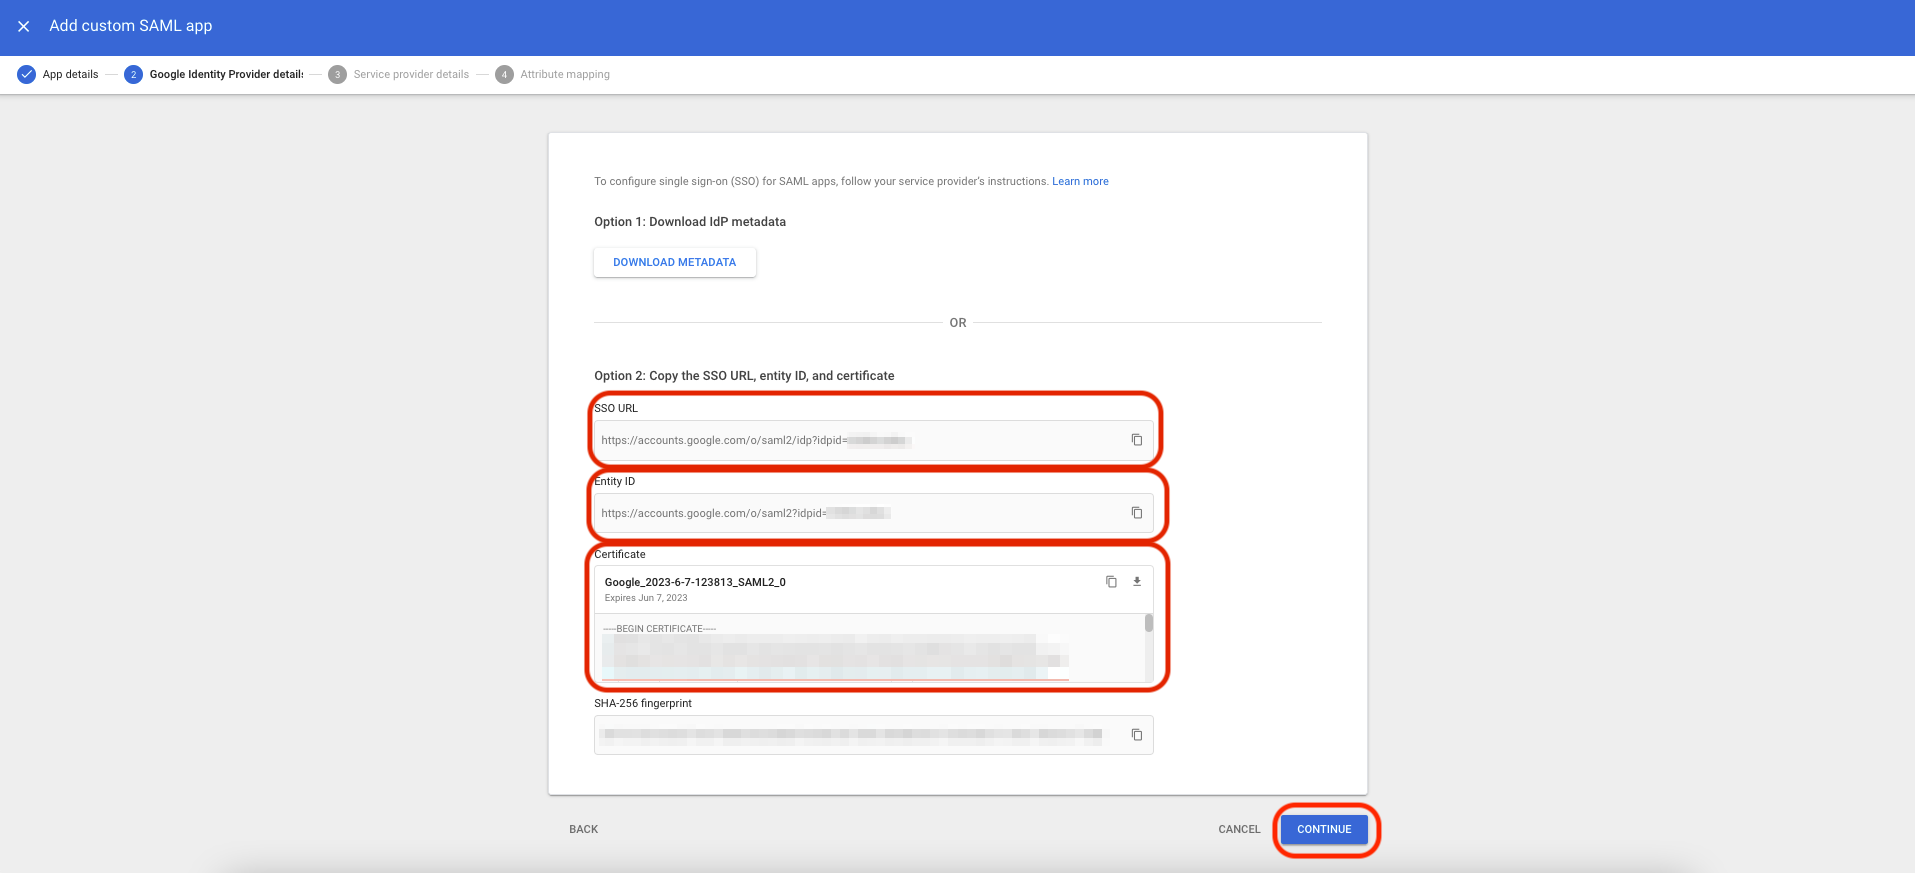
Once complete, select Continue.
Step 2: Configure SAML support in Redis Cloud
Now that you have your Google Workspace IdP server information, configure support for SAML in Redis Cloud.
Sign in to Redis Cloud
Sign in to your account on the Redis Cloud console.
Activate SAML in Access Management
To activate SAML, you must have a local user (or social sign-on user) with the owner role. If you have the correct permissions, you will see the Single Sign-On tab.
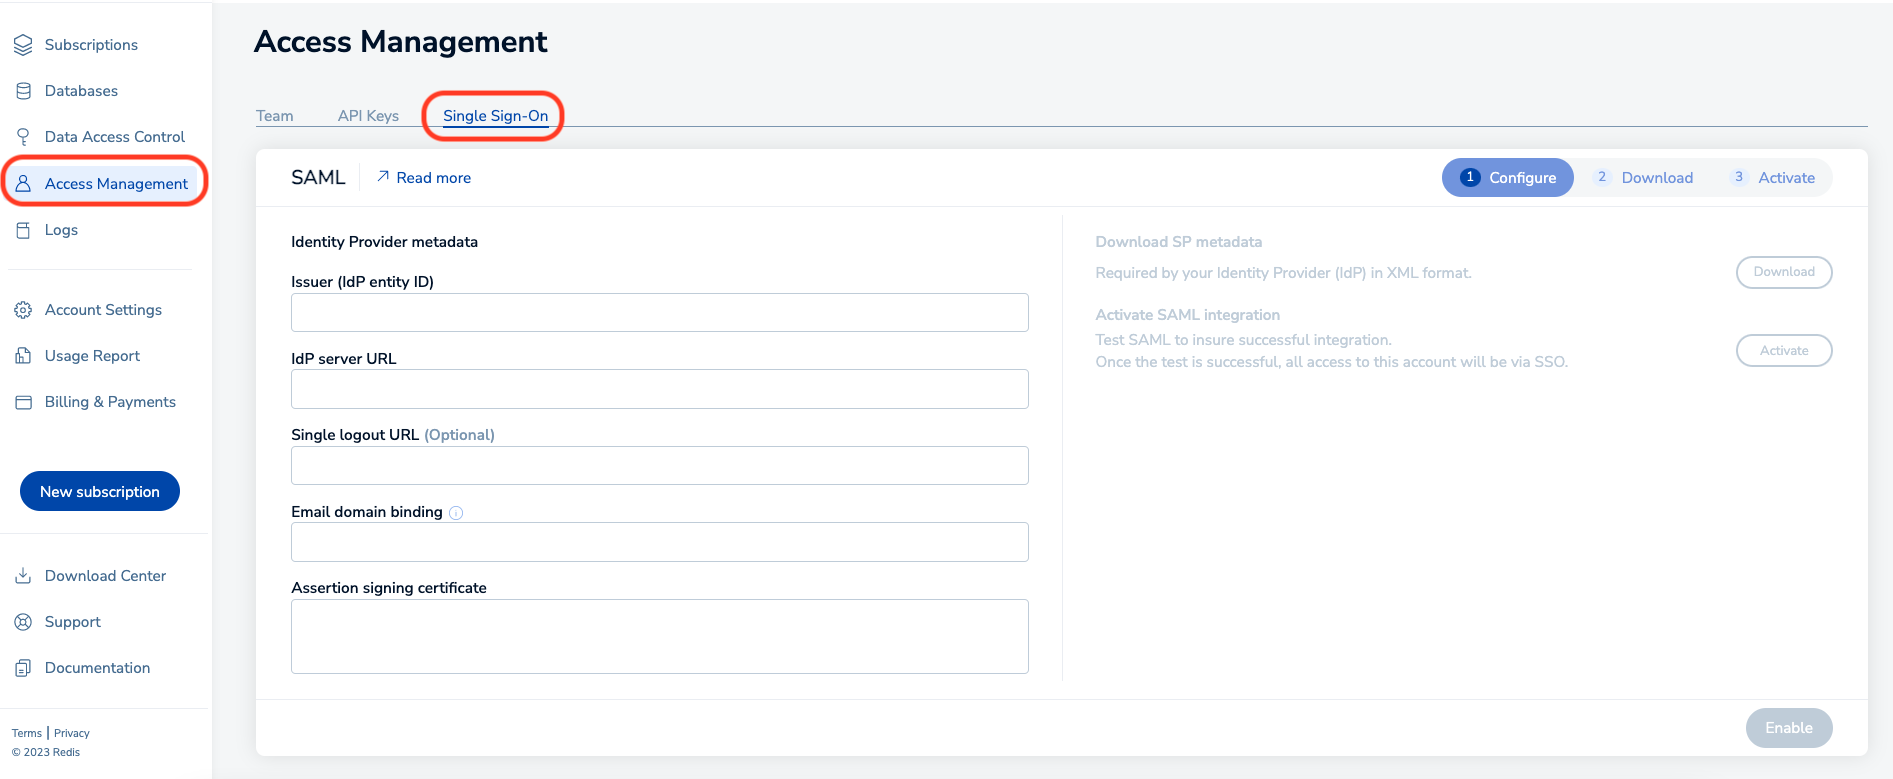
-
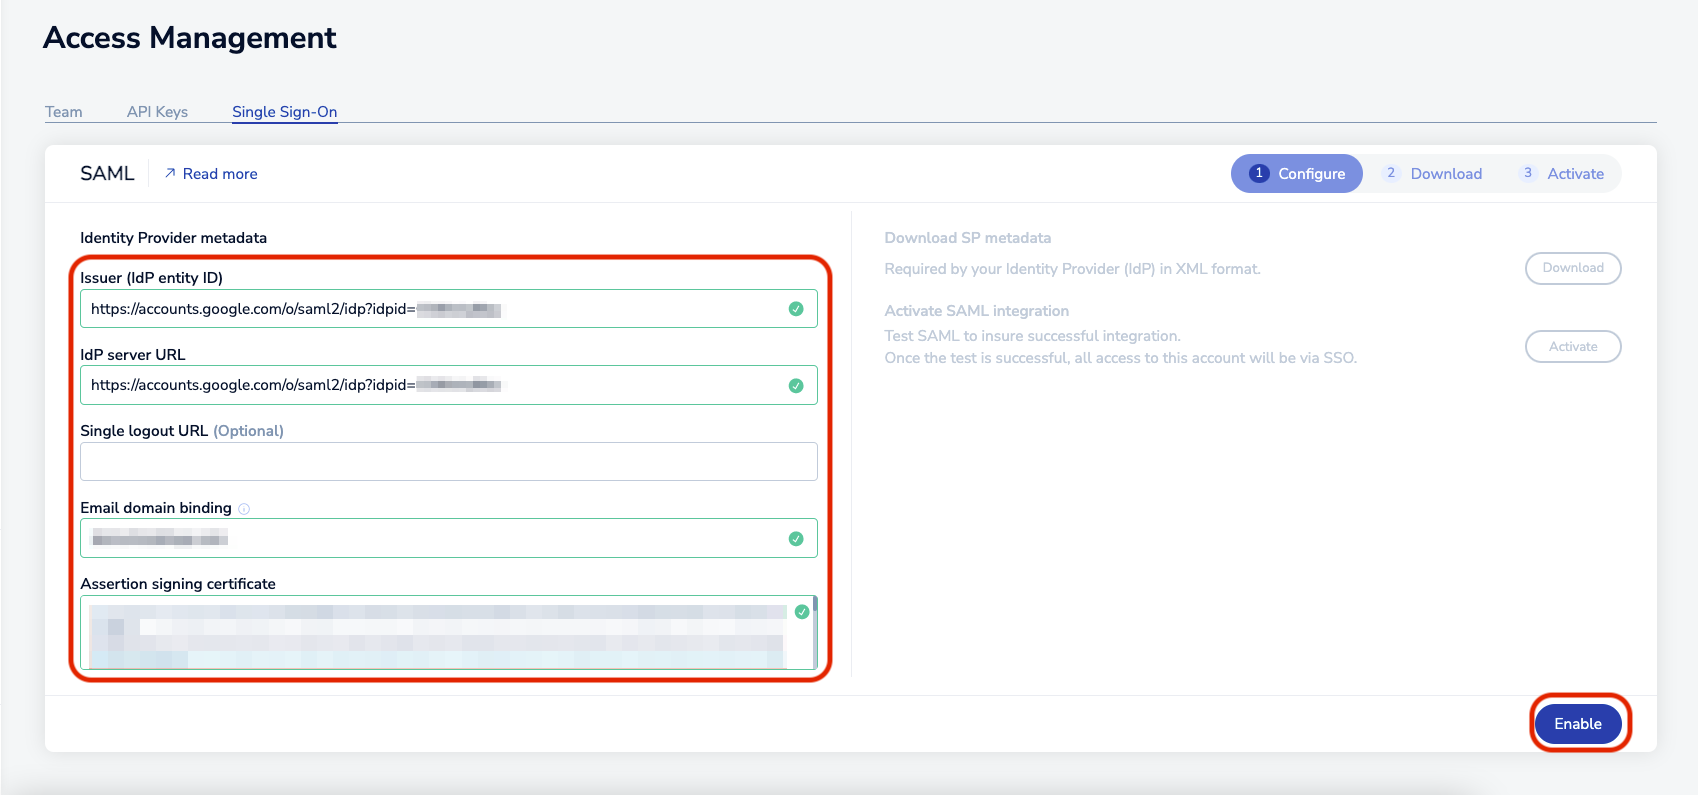
Add the information you saved previously in the Google identity provider details screen. This includes:
- Issuer (IdP Entity ID):
Entity ID. - IdP server URL:
SSO URL. - Assertion signing certificate:
Certificate.
Also add:
Select Enable and wait a few seconds for the status to change.
- Issuer (IdP Entity ID):
-
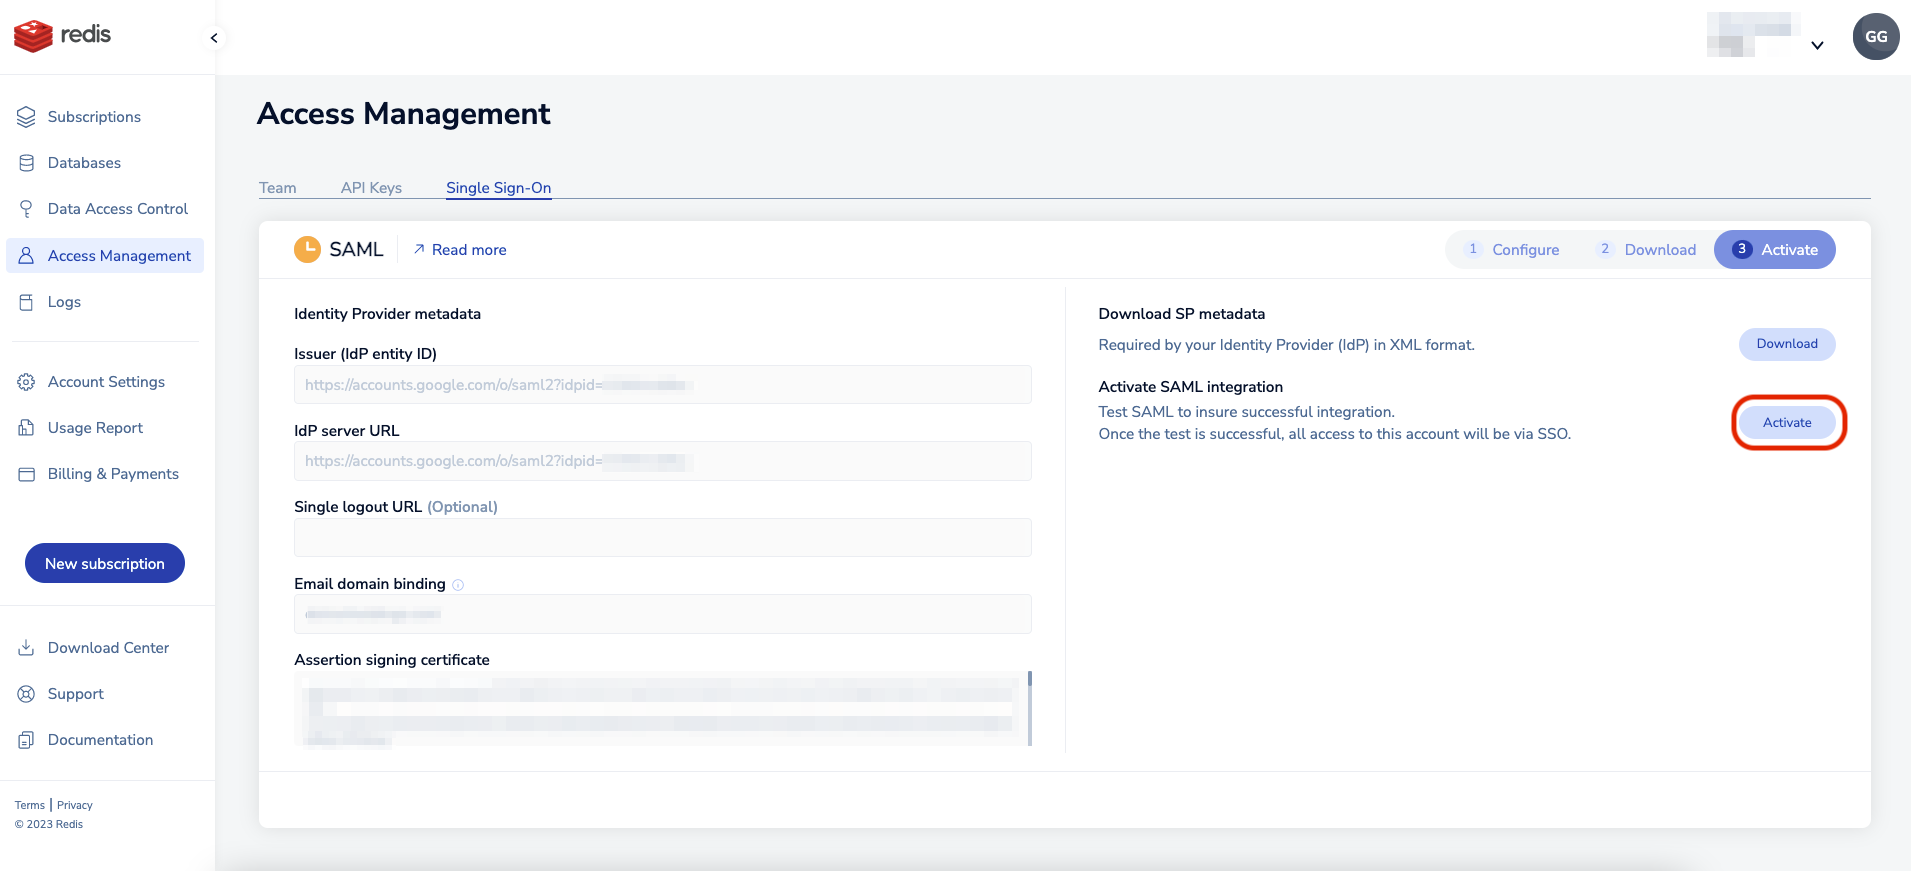
Select Download to get the service provider (SP) metadata. Save the file to your local hard disk.
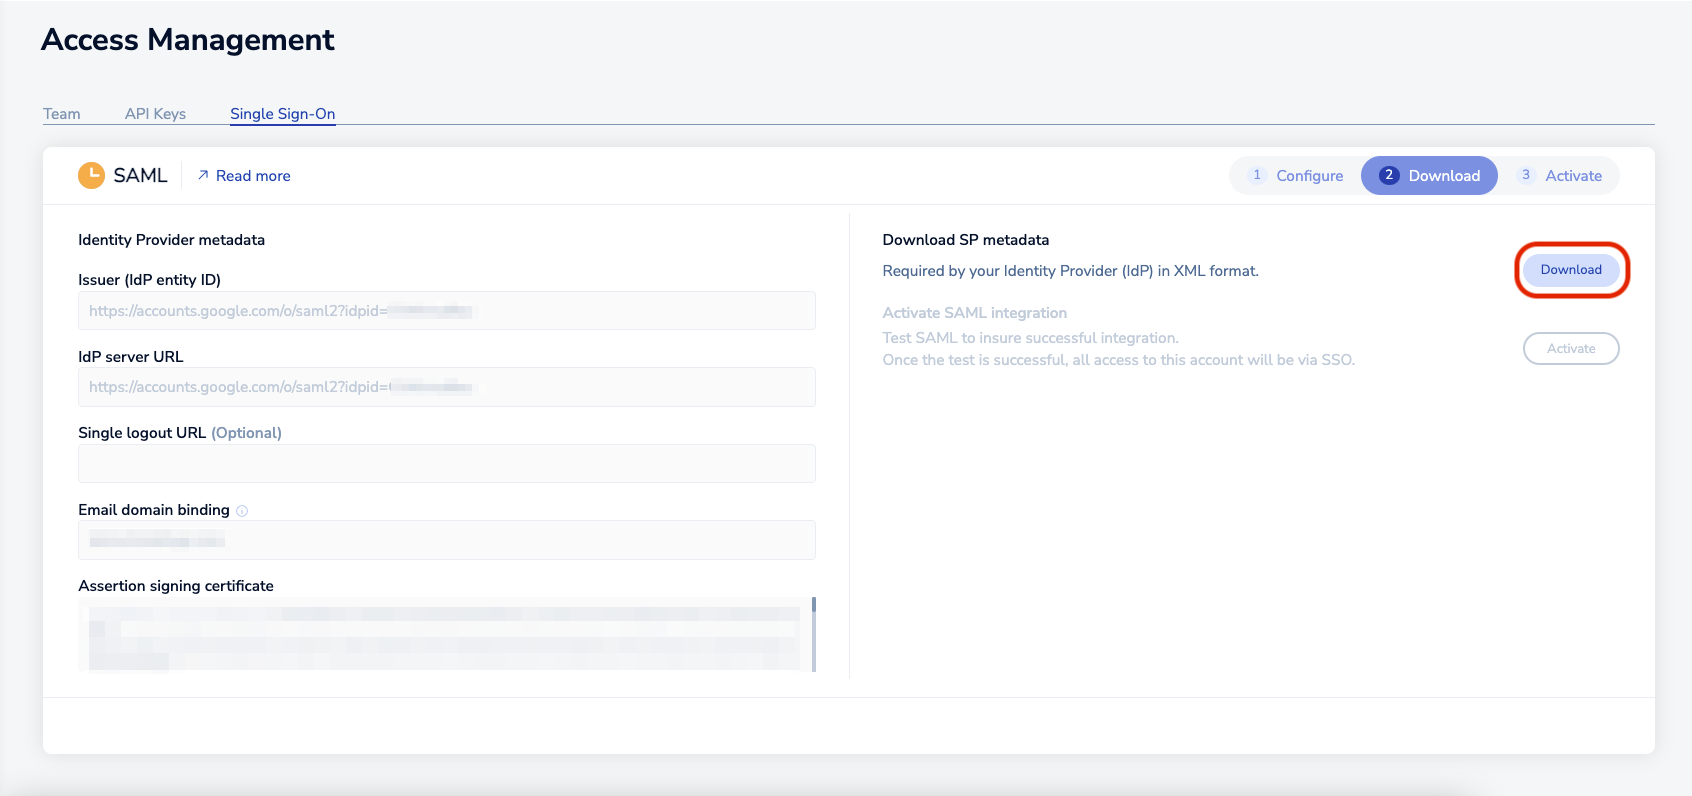
-
Open the file in any text editor. Save the following text from the metadata:

Step 3: Add a custom attribute to Google Workspace's user profile
-
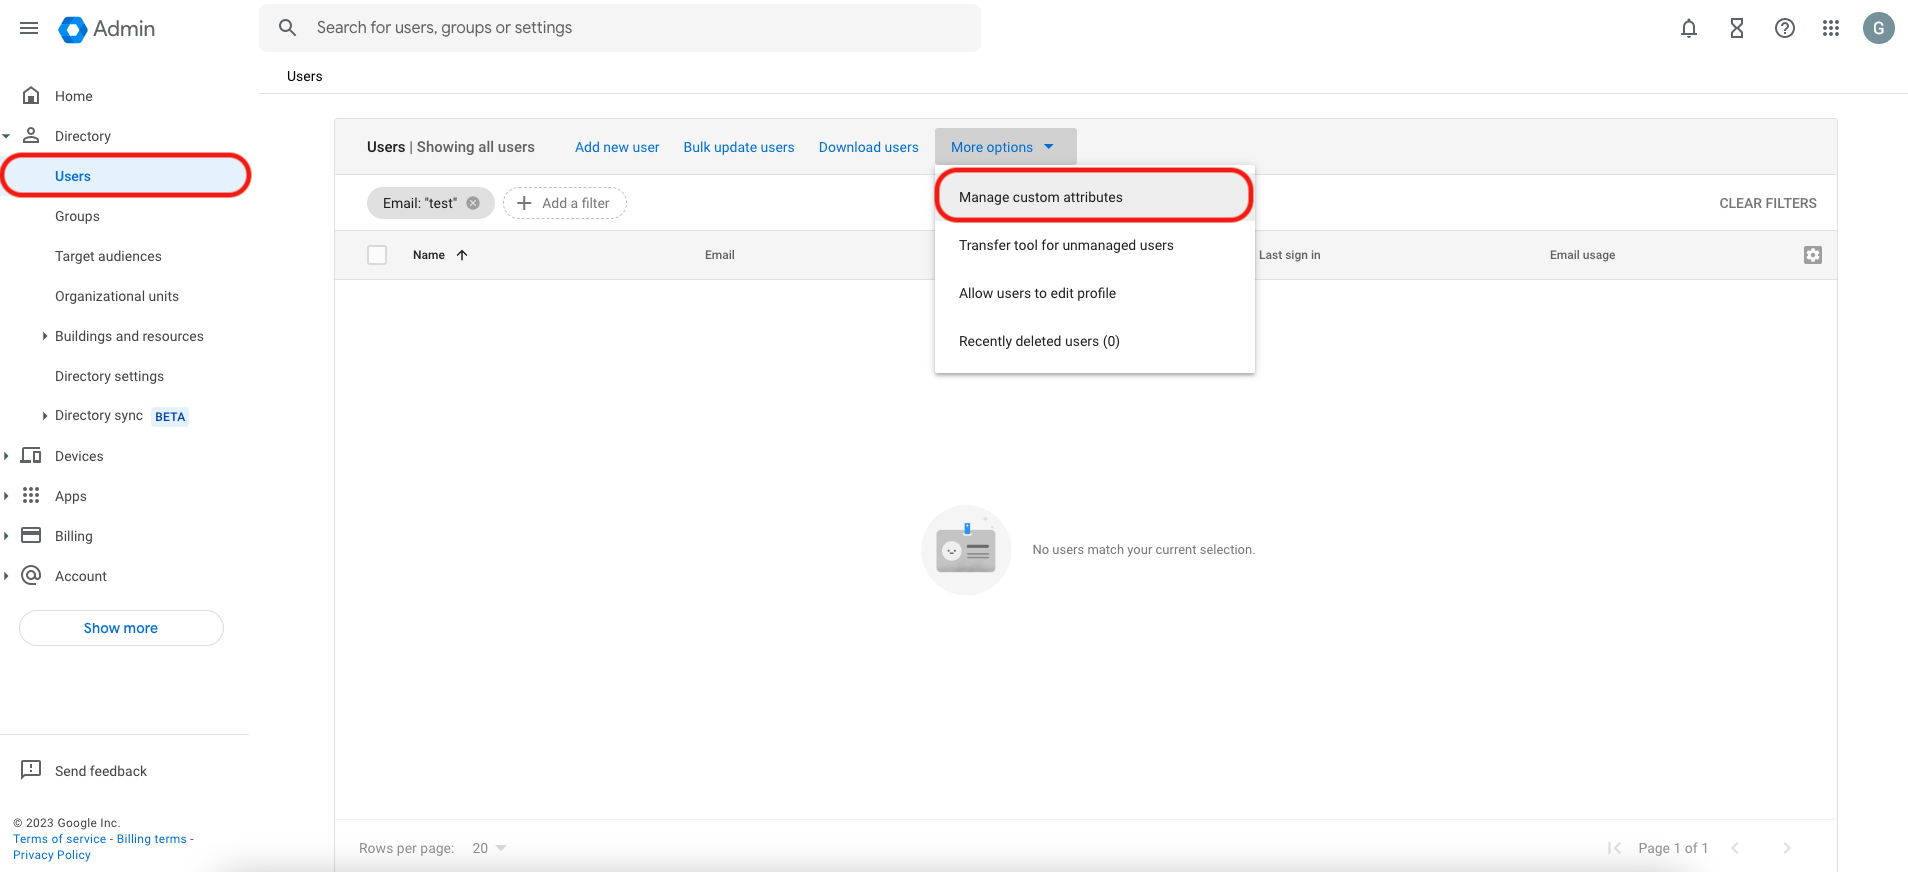
From the main menu in Google Workspace, select Directory then Users, and from the more options dropdown select Manage custom attributes.
-
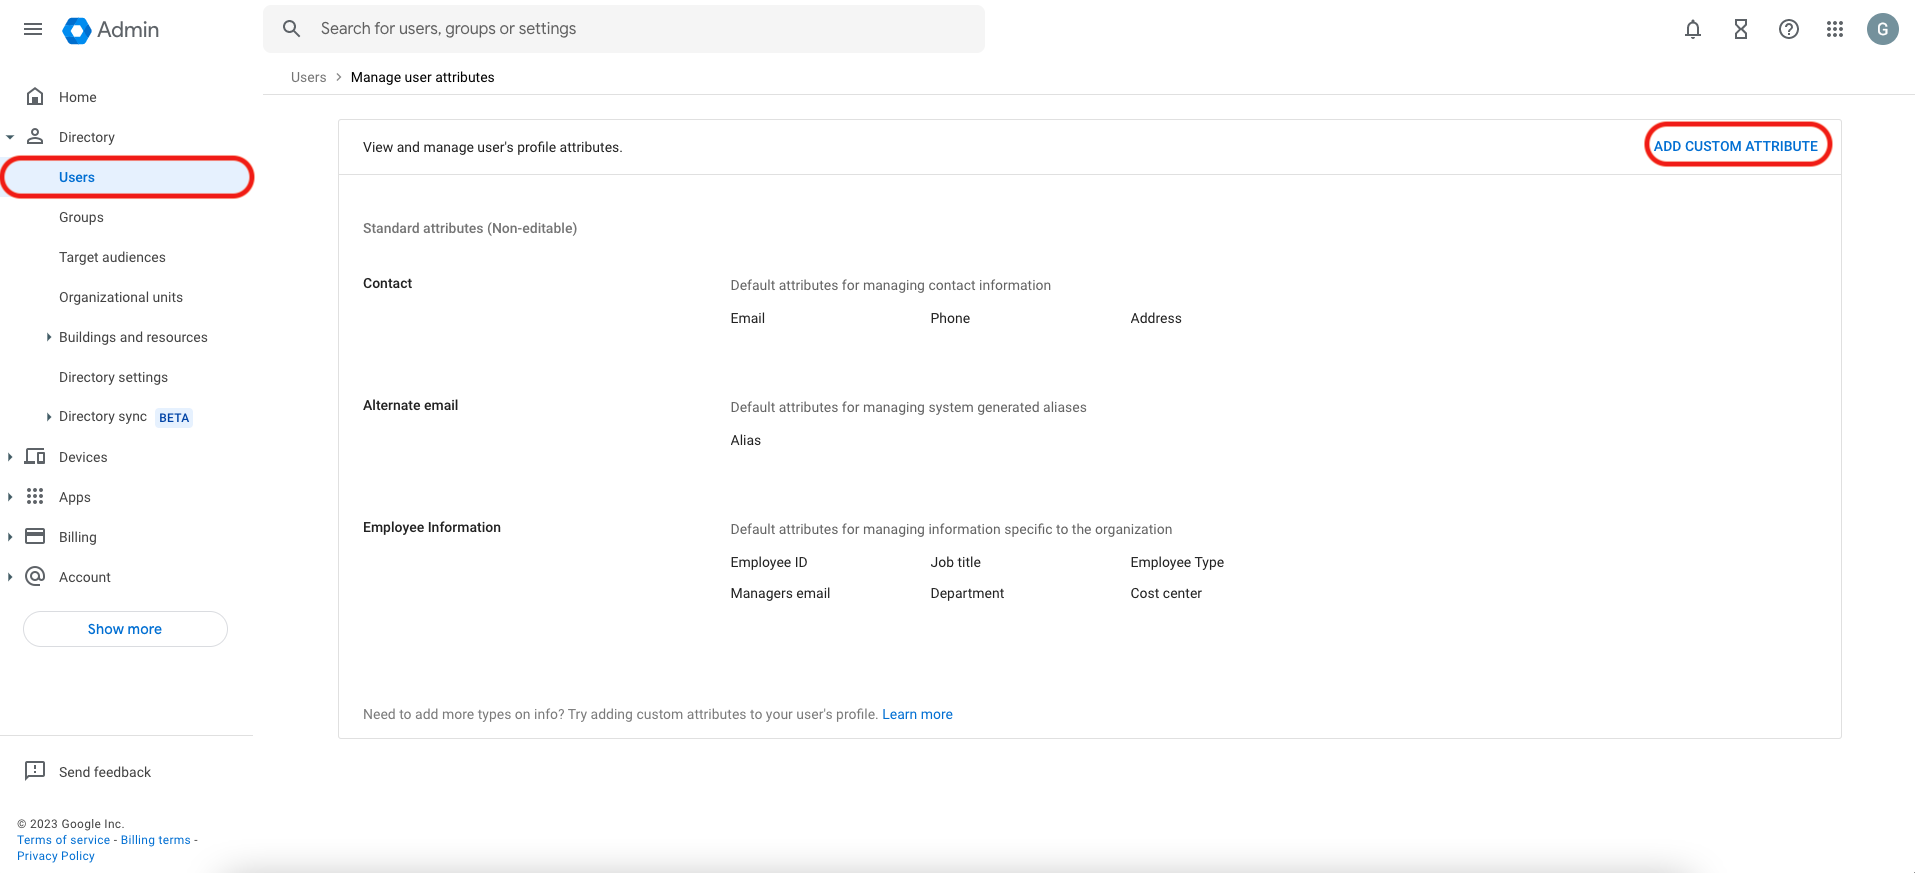
From the Manage user attributes screen, select Add Custom Attribute.
-
Add the following information for the new custom attribute:
- Category:
Redis Cloud - Name:
redisAccountMapping - Info type:
Text - Visibility:
Visible to user and admin - No. of values:
Single

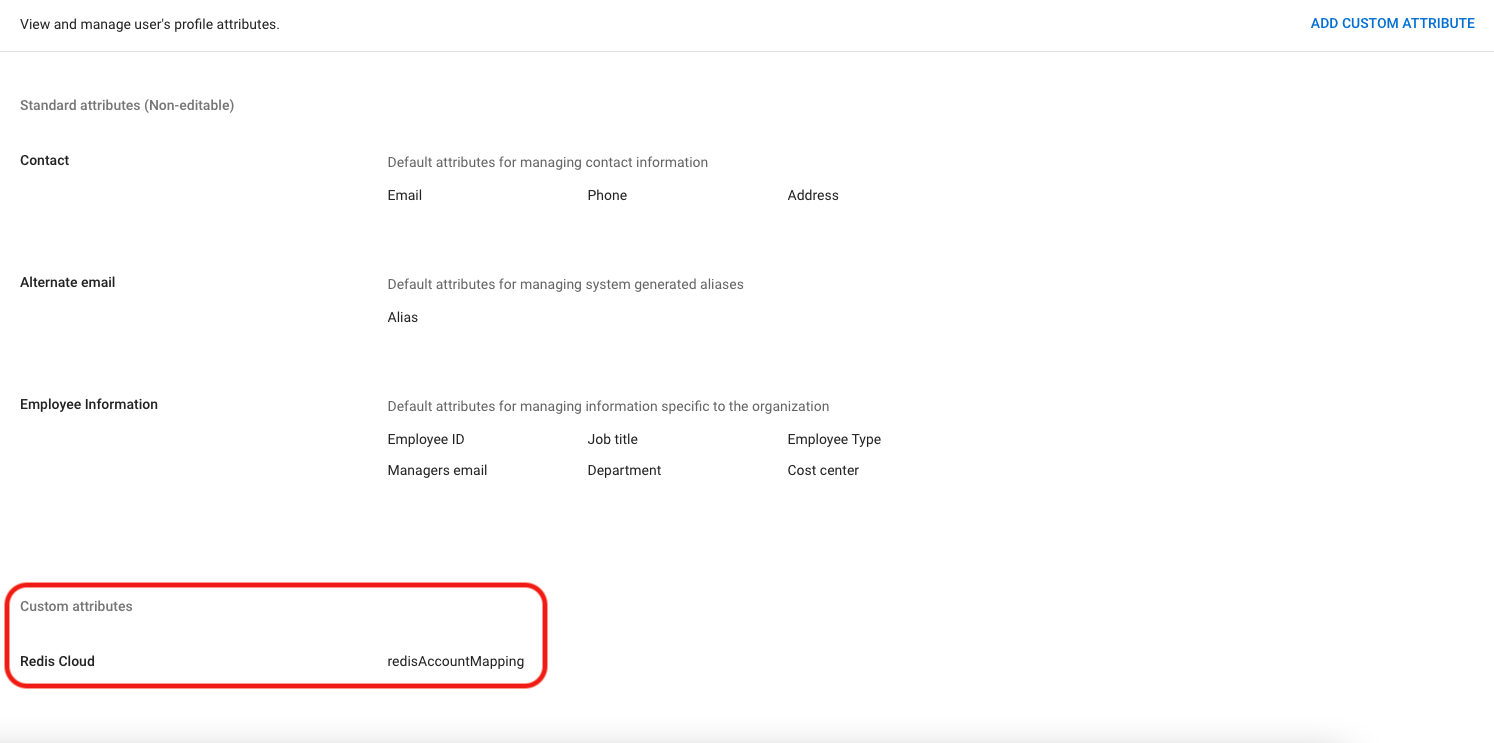
Once complete, select Add. The summary page now displays the new redisAccountMapping custom field.
- Category:
-
From the main menu in Google Workspace, select Directory then Users, then select the user you wish to configure.

-
Each user who needs to access Redis Cloud through SAML needs to define the redisAccountMapping attribute. The
redisAccountMappingkey-value pair consists of the lowercase role name (owner, member, manager, billing_admin, or viewer) and your Redis Cloud Account ID found in the account settings.
Once complete, select Save.

Repeat this step for each user who needs to define the
redisAccountMappingattribute.
Step 4: Finish SAML configuration in Google Workspace's Redis Cloud Application
-
Return to the Service provider details screen in Google Workspace, and add the following information:
- ACS URL: The Location from the downloaded service provider (SP) metadata
- Entity Id: The EntityID from the downloaded service provider (SP) metadata
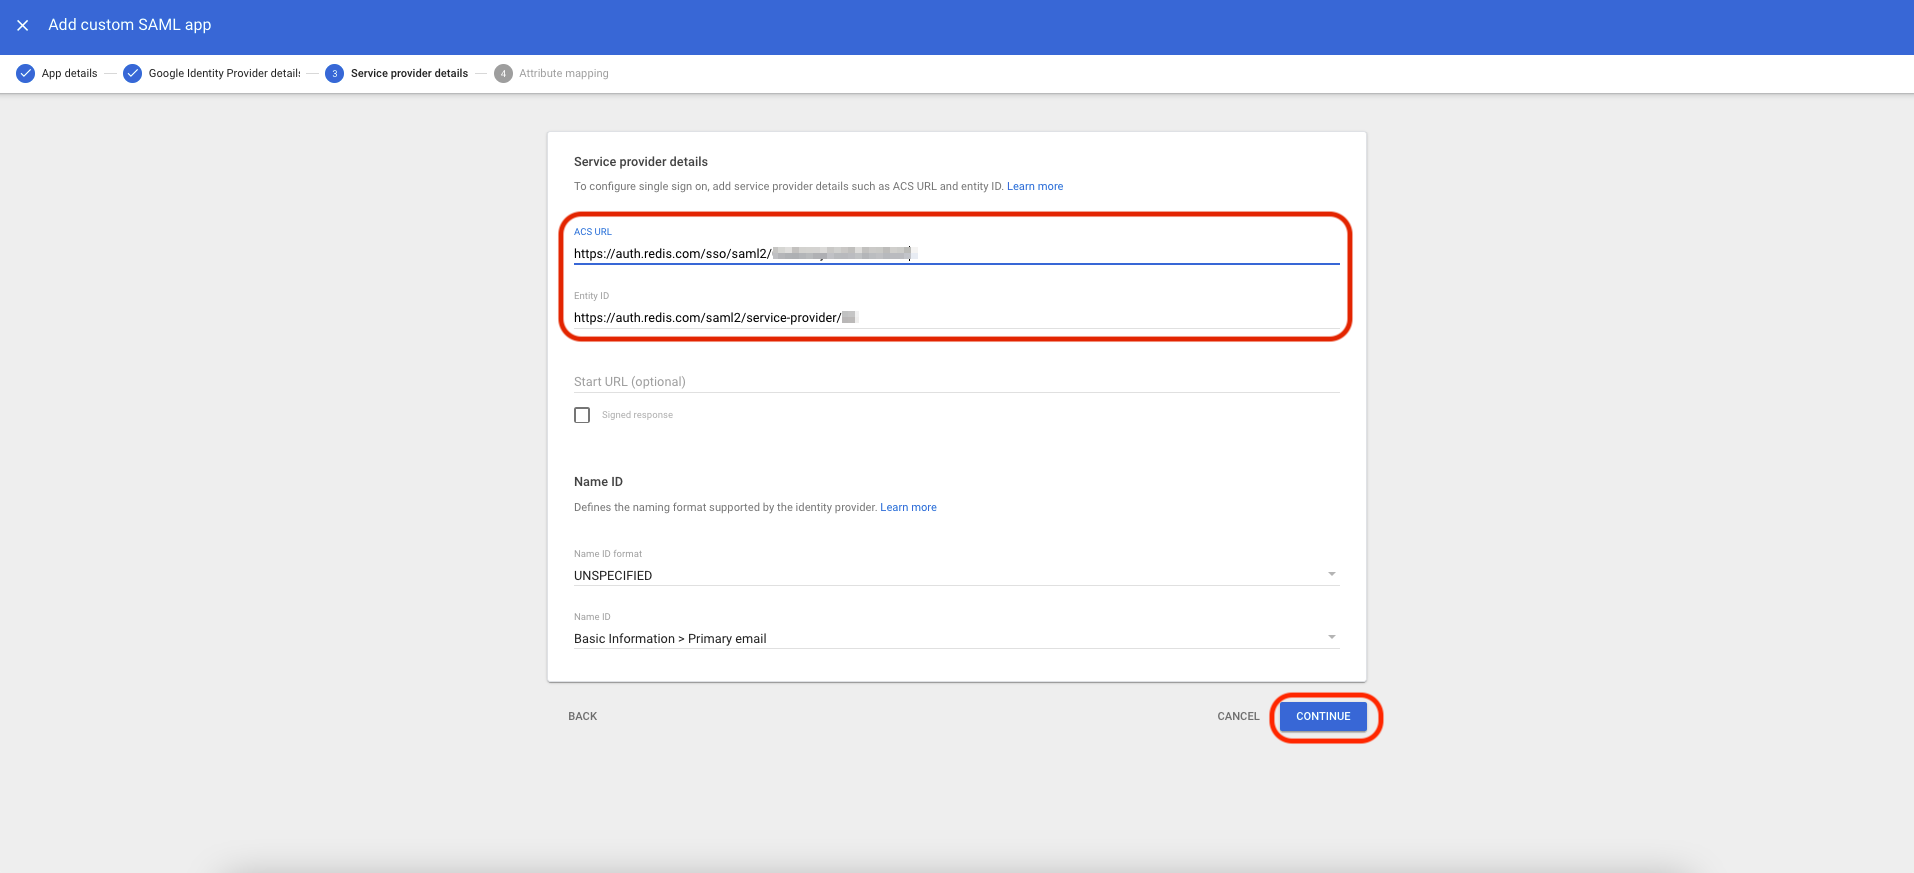
Leave the Name ID default information as it is. Once complete, select Continue.
-
Configure the Redis Cloud application's attribute mappings. Select Add Mapping.
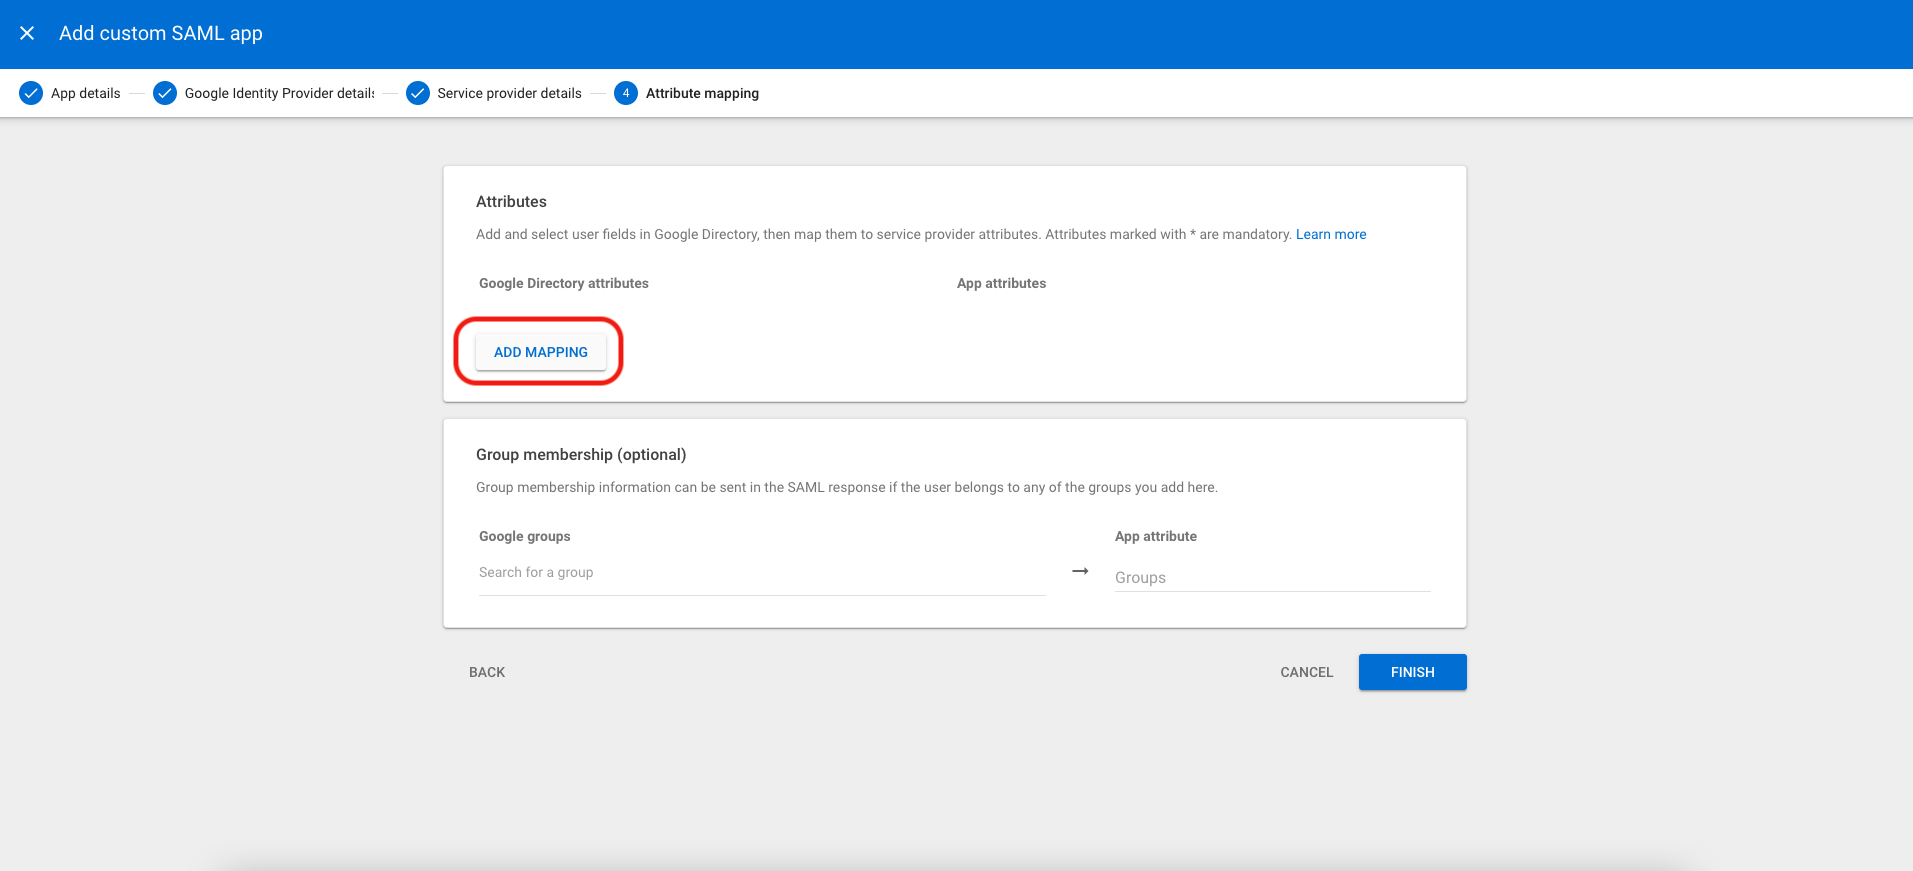
In the next screen, map these attributes:
- Primary Email:
Email - First name:
FirstName - Last name:
LastName - redisAccountMapping:
redisAccountMapping
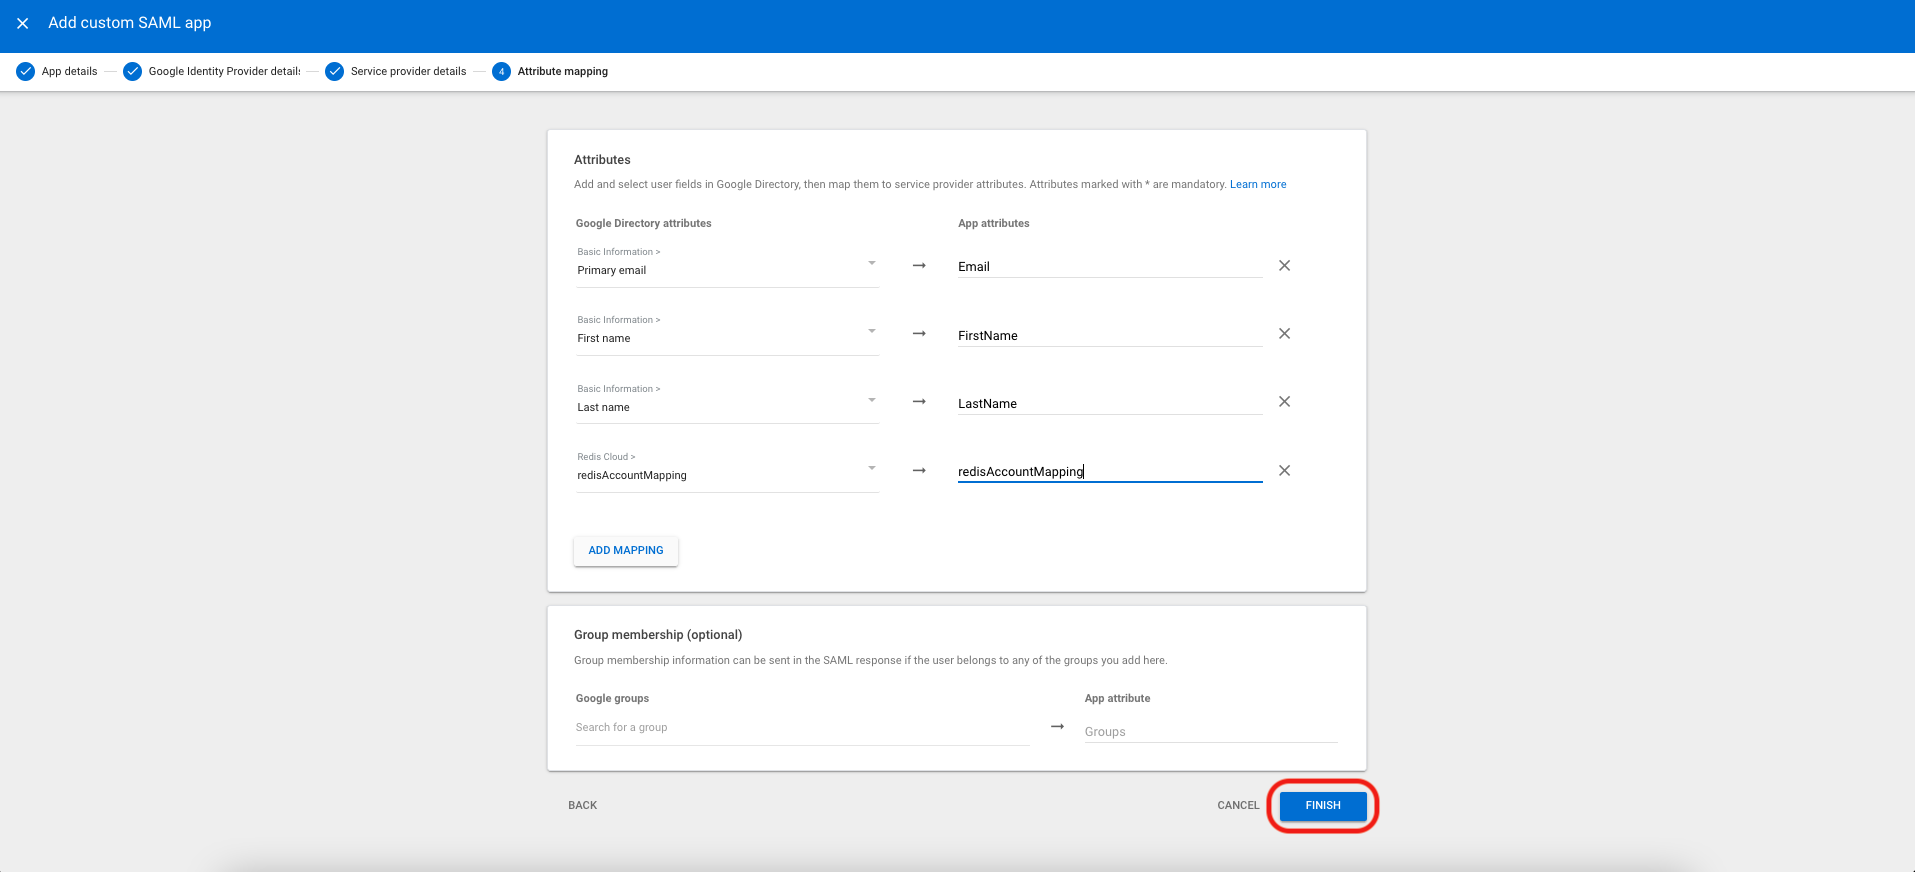
Once complete, select Finish.
- Primary Email:
-
Next, we need to turn on the Redis Cloud service for all users, select Web and mobile apps -> Redis Cloud and then service status. Select ON for everyone. Once complete, select Save.

Step 5: Activate SAML integration
The final step in our SAML integration with AWS IAM identity Center is to activate the SAML integration.
A logout notification screen displays, letting you know that you are redirected to Google's login screen.
-
Select the Google account you wish to login with.
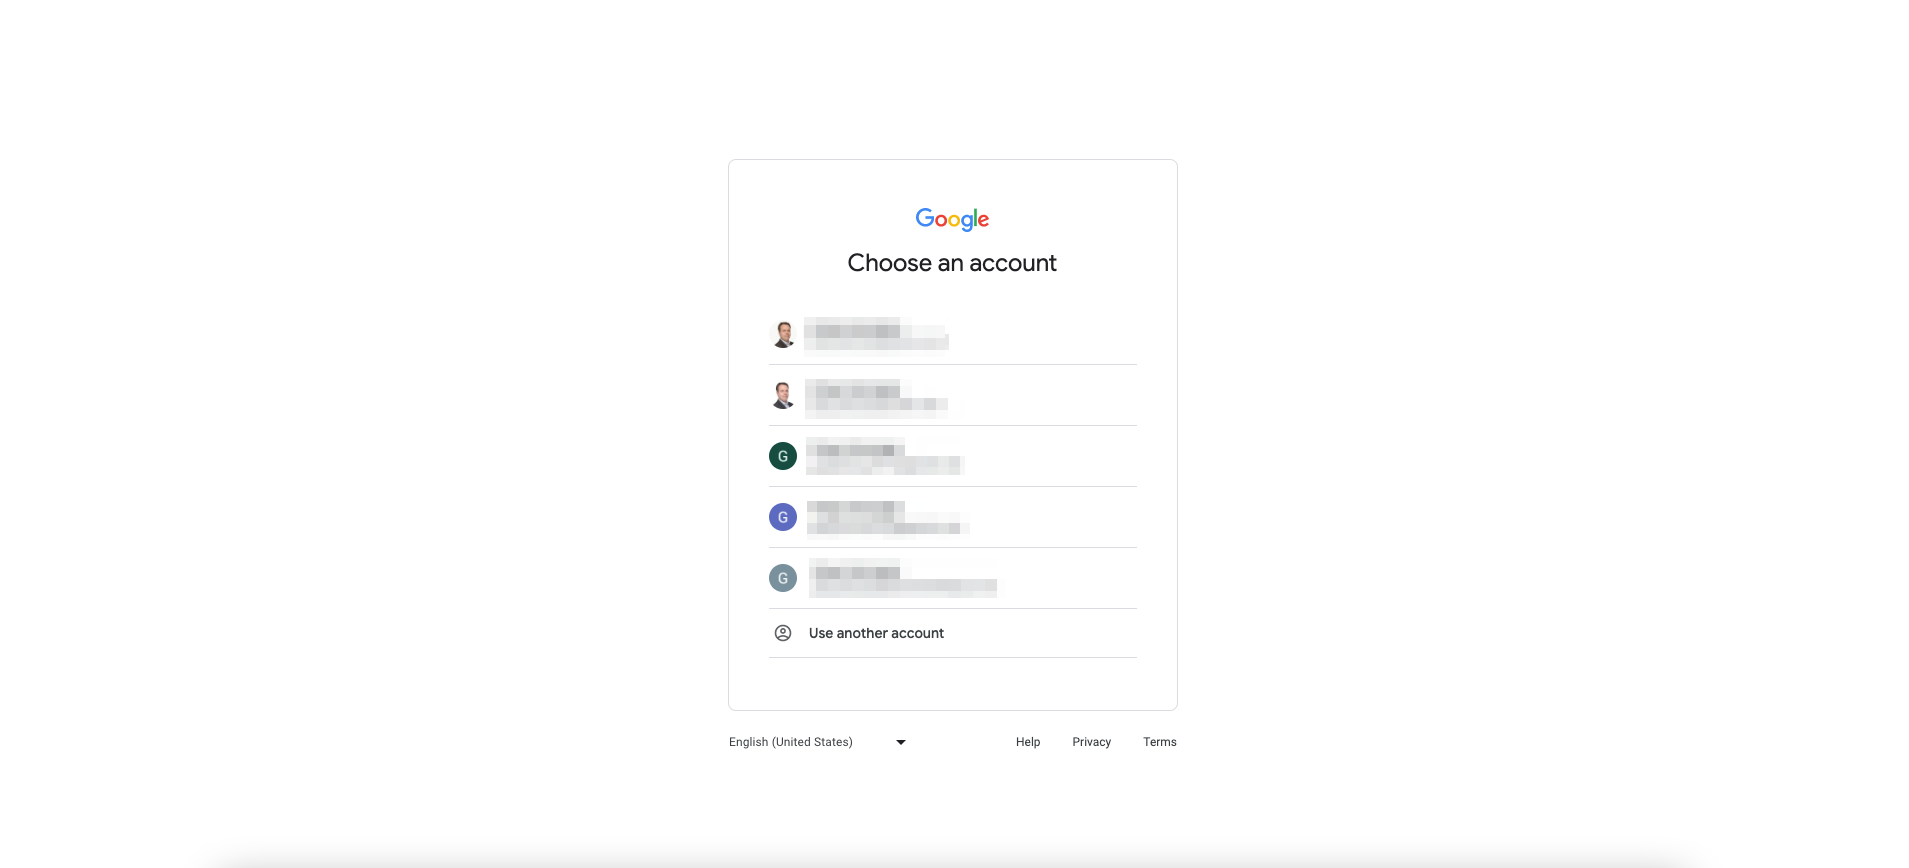
-
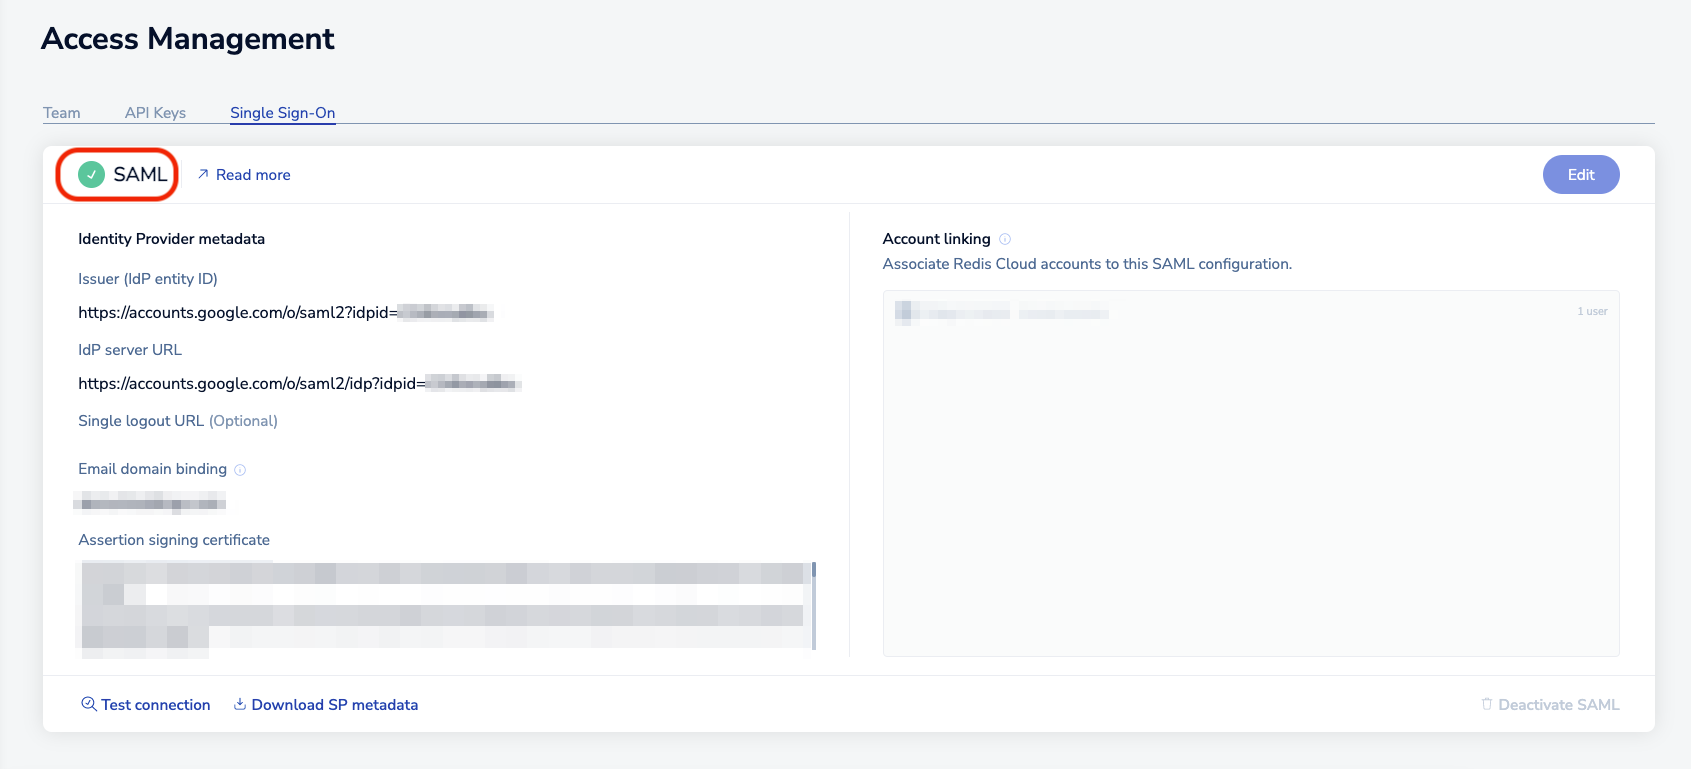
If everything is configured correctly, you should get a SAML activation succeeded message. From this point forward, users need to click SSO to log in to the Redis Cloud console.
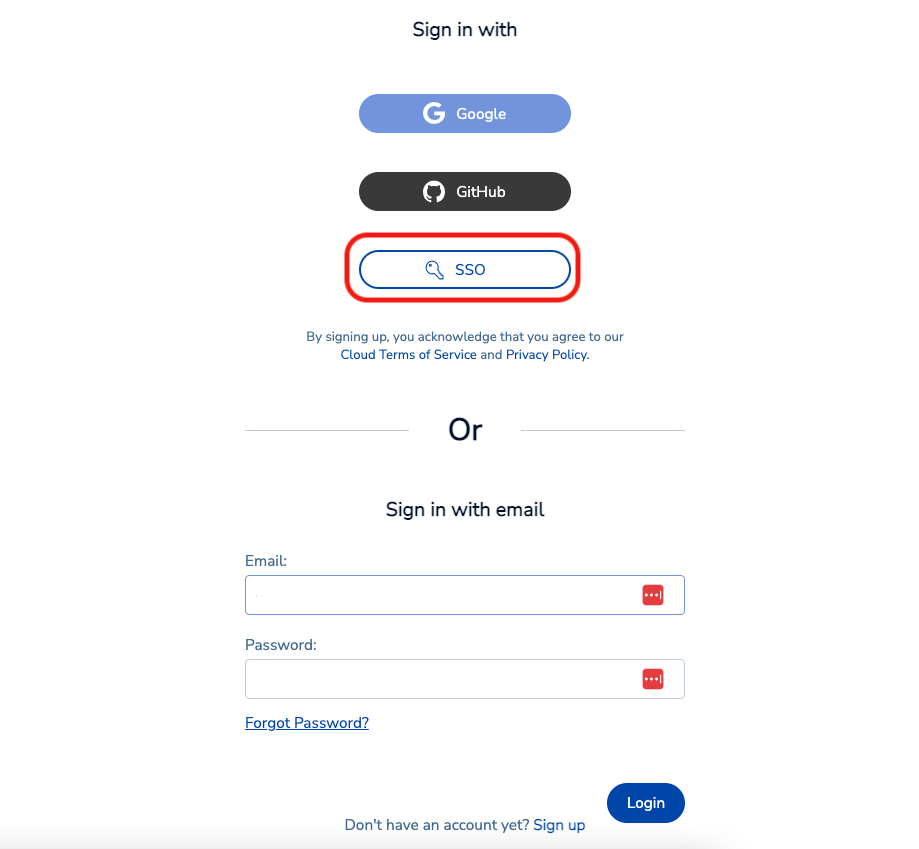
A message displays, stating that your local user is now converted to a SAML user. Select Confirm.
You have successfully configured Google Workspace as an identification provider.
